QUBES Groups may contain many users with a common interest or goal. For example, many users may join a group on QUBES to participate in a workshop or Faculty Mentoring Network. Within large groups, a need may arise for smaller working groups. Projects are workspaces available for small groups to work towards their specific goals.
In an existing group, create a Project from the side menu:

On the Projects Page, click "Add Project" on the top left of the page.

You will now create and describe your project.
First, enter a Title that is short but descriptive for your Project. You will also enter an alias. This will be used to generate the project url, so it should also be short, yet indicative of the Project's content. The system will inform you of the availability of the project name and alias.
First, enter a Title that is short but descriptive for your Project. You will also enter an alias. This will be used to generate the project url, so it should also be short, yet indicative of the Project's content. The system will inform you of the availability of the project name and alias.
You will then be prompted to describe the project. Adding a project description allows others to see what you are working on, and request more information from you if they are interested.
If you decide to describe your project now, you will enter a description about what your project team will work on. You can then decide if you would like the project to appear in searches.

The QUBES best practice for projects is to make them searchable. This means that your Project could be found based on keywords in the title. If a user is interested, they can contact the group to get involved. Your project workspace, information, files, and other content is still private to your Project Team.
You can also add a Project logo, to easily distinguish your project from other projects in your group. When you have completed this page, click "Save and Continue."
Project Team
Now you can add team members to your project. Because this project was created within a Group, it is easy to add group members to the Project team. Users outside the Group, and other entire groups may be added to the Project as well.
You can always return to this page to edit team membership.
Most likely, you will want a subset of your group's members on your Project Team.
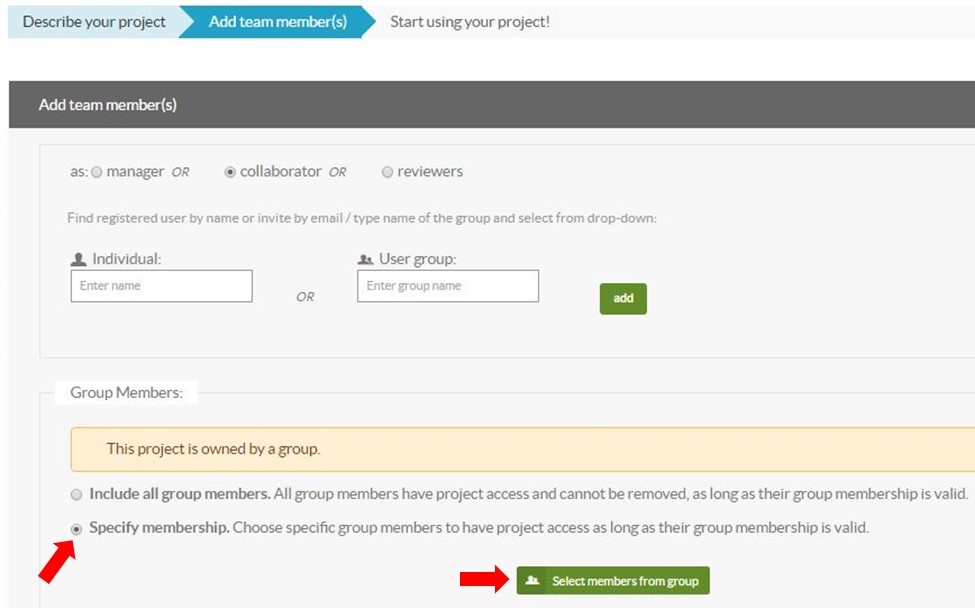
Clicking, "Select members from group" will open a window, allowing you to select team members from the group. Make your selection and click, "Save."
The users you selected will now appear under "Team Members." From here, team roles can be adjusted. The different roles are described on this page of the process, and definitions are provided below as well:
- Collaborator can:
- upload and manage project files
- edit project publications
- use available project tools, e.g. notes and to do's
- Manager can:
- invite or remove other team members
- change project information and global settings
- do everything that a collaborator can do
New members are automatically added as Collaborators. To change the role of a team member, click on their role to open a drop down menu. Make your selection and save. You must save after each change. The creator of the project is automatically a manager. This cannot be changed.

Finally, click “Save all and Continue” at the bottom of the page to create your project. You will be taken to your new Project page. To return to your group home page, click on your group name at the top of the page:
